DIY Patch Display Pillow

As many of you know, I’m addicted to hiking.

Fresh, crisp mountain air, burning thighs, cool animals and plants, the views…I can’t get enough.

After Half Dome, I started collecting patches from the locations/national parks where I’ve hiked. I guess I’ll just have to return to the places I hiked prior to that, drat 😉

For months, I’d been trying to find a neat way to showcase the patches. I wanted something that could readily remind me of the great memories and keep my love affair with hiking strong since living in North Texas isn’t very scenic…hopefully grad school or a job will take me to a more hiking-friendly location one day haha 😀 I had them hot glued on my hiking backpack for awhile, but they started falling off, and I didn’t want to risk losing them. I would’ve sewn them on, but the patches proved to be impenetrable to a needle. I also considered framing them in a shadowbox, but it just seemed “meh” to me.

Introducing…

The patch pillow!!

patch pillow

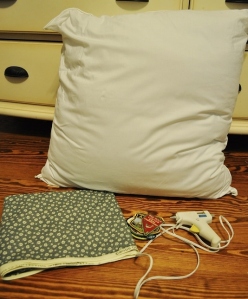
What You’ll Need:

  • Needle and thread (or sewing machine if you’re high-tech like that)
  • Pillow
  • Fabric (unless you like the pillow how it is)
  • Patches
  • Hot glue gun

patch pillow - what you need

Instructions:

patch pillow process

  1. Cut some fabric to fit your pillow and flip it inside out so the seams won’t show.
  2. With a needle and thread, stitch closed 3 of the sides of the fabric, leaving about half of the fourth side open. You could bypass the whole needle and thread aspect if you have a sewing machine.
  3. Flip fabric inside out (so the pattern is on the outside and your stitches are on the inside) and stuff the pillow into the hole you left.
  4. Once pillow is inside the fabric, sew the rest of the fourth side and tie a good knot at the end.
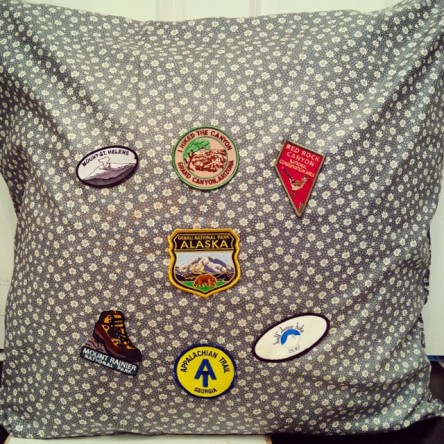
  5. Fire up your hot glue gun and arrange your patches to your heart’s desire!

patch_pillow

The pillow now resides on my bed and each night, I look at the patches, reflecting on the fun memories and hoping to dream of the adventures each patch represents! 🙂
Breakfast Never Tasted So Good (Review)

When I say the word “oatmeal,” what pops into your head?

A piping hot bowl of delicious mush that greets you on a cold, winter morning? Grandma’s homemade oatmeal raisin cookies, fresh out of the oven? Tiny round grains sprinkled on top of yogurt or featured on the crust of your favorite bread?

Well, what if you could create your own flavor and ingredient combination to replicate your favorite form of oats?

Tada! Lemme introduce you to… My Oatmeal!

After hearing about My Oatmeal from friends on Instagram, I contacted the company regarding blog reviews. Anthony, the founder, got back to me right away and GRACIOUSLY provided me with an opportunity to sample some of their products.

I was more excited than a dog chasing a squirrel.

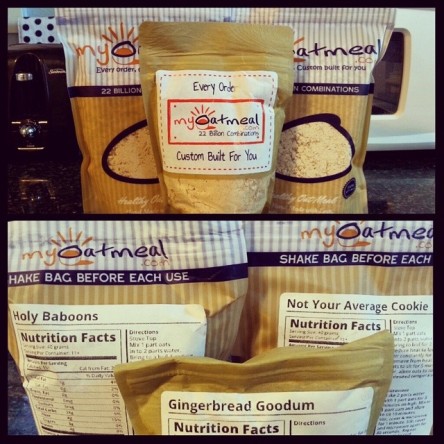
My_Oatmeal My_Oatmeal_Creations

Before I begin though, I have to mention that I was not paid or influenced in any way for this review. The opinions I express are solely my own.

Onto the review!

Basically, this company rocks.

First off, the website was SO much fun to navigate. I loved being able to pick ingredients and see the nutritional information of your creation pop up on the sidebar. The ingredients were also arranged in easy-to-follow categories like fruits, nuts, sweeteners, flavors, and oat or PB lean type. And did I mention the copious amounts of flavors?! It was hard to decide! Red velvet cake, banana bread, sugar cookie, german chocolate cake…the list of exotic, unique flavors goes on and on! Another cool touch is that you can name your DIY’ed food goodie bag–perfect to mark your territory ermmm….I mean customize your creation.

So how did they measure up?

“Holy Baboons” Oatmeal– Gluten free quick oats with banana bread flavor and dates.

Banana Bread Dates Oatmeal

Taste: Tasted like fresh baked banana bread and just the right amount of sweetness. Really nice after flavor, too. Next time I’d get more dates though, there weren’t a whole lot in the mix. My mom said this was her absolute favorite!

Texture: Very smooth and soft, cooked great in the microwave.

Smell: Bananas!!

~~~~~

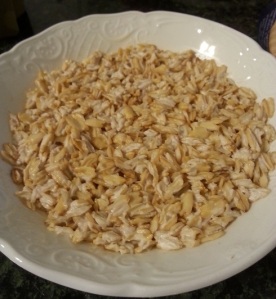
“Not Your Average Cookie” Oatmeal– Gluten free thick rolled oats with oatmeal cookie flavor, honey flavor and organic cane juice crystals

Oatmeal Cookie Honey Oats

Taste: Identical to a true oatmeal cookie, and a little hint of honey. Super delicious! Totally want to use this in cookie batter one day.

Texture: Very grainy, I think I should cook it on the stove next time, it never got really soft.

Smell: Fresh baked oatmeal cookies, it made the kitchen smell amazing! Super inviting aroma.

~~~~~

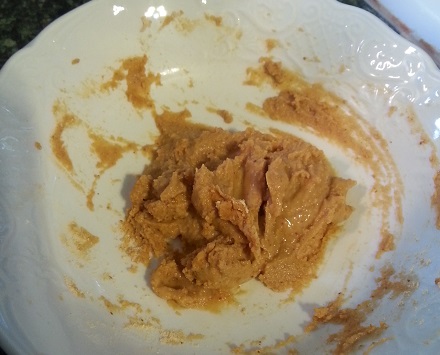
“Gingerbread Goodum” PB Lean– light roasted, powdered peanut butter with gingerbread flavor and brown cane sugar

Gingerbread PB Lean

Taste: The peanut taste sorta overpowered the gingerbread when it was eaten alone. When I added powder to a smoothie, it blended well and gave a pleasant, peanutty flavor. Just wish there was a little more of a gingerbread flavor.

Texture: I added a little bit of water gradually and stirred until it had a creamy, paste-like consistency. AWESOME! It made smoothies thick, too.

Smell: Mostly peanut butter, with a tiny hint of gingerbread.

~~~~~

Overall: I will definitely be purchasing from My Oatmeal again, five stars! Not only do they have a ton of options, but the oatmeal is high quality and delicious. I’m considering using the oats in cookies one day, can you imagine the deliciousness?!

Thanks again so much Anthony, and everyone at My Oatmeal, for the opportunity to try your product! My family and I are hooked! 😀

Crockpot Magic: Chicken Thighs and Root Veggies

I’ve decided that whoever invented crockpots was a genius.

Plop some ingredients in a dish and 6 hours later BOOM. Delicious gourmet feast.

Genius for all of the self-proclaimed, lazy kitchen chefs (*cough cough* me).

Story time: Prior to this recipe, I’d never delved into the world of crock-potting (?). It always intimidated me, I guess. WELL. This weekend, I noticed that we had some extra chicken thighs in the fridge. Instead of resorting to the usual bake or fry avenue,  my mom suggested trying out something new. So, to Pinterest I went! What slapped me in the face? TONS of suggestions to use chicken thighs in a crockpot for a richer, more tender flavor. So, I put my fears aside, dusted off the ol’ crock residing in the deep, dark caverns of our pantry, and got to work!

Behold! This is the creation I came up with based on the ingredients we had on hand as well as food preferences, so feel free to try alternative veggies etc. We’re a voracious family, so the whole batch was gone in one and a half days mwahaha

Slow Cooker Chicken Thighs and Vegetables

(gluten free, paleo)

crockpot chicken thighs (ingredients)

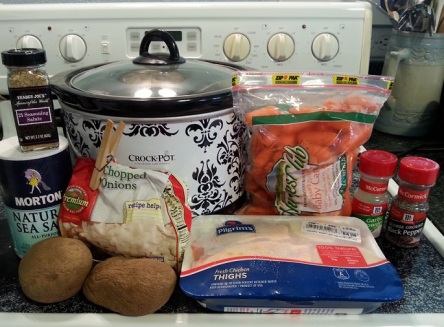
Ingredients:

  • 6 quart crockpot
  • 1/4 cup diced onion
  • ~1 tbsp. ghee or oil
  • 2 russet/baking potatoes, skinless
  • 2 cups whole baby carrots
  • 1/4 cup water
  • 1 tsp. garlic powder
  • 1 1/4 tsp. salt
  • dash of pepper
  • 1 tsp. Trader Joe’s 21 Seasoning Salute
  • 4 bone-in chicken thighs (with skin)

Instructions:

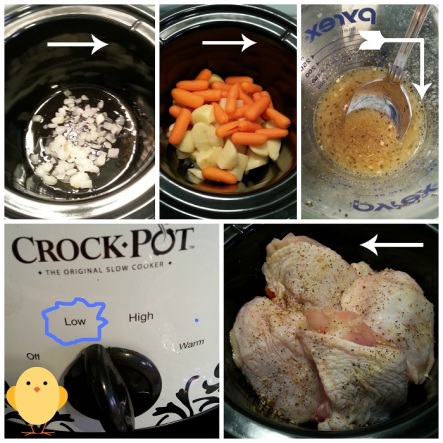
1. Grease a 6 qt. crockpot with ghee and set temperature on LOW. You could sub nonstick cooking spray instead.

2. Place onion chunks in ghee. Cut skinned potatoes into bite-sized chunks and place on top of onions. Top potatoes and onions with baby carrots.

3. Combine water, garlic powder, salt and pepper in a glass and pour over veggies.

crockpot chicken thighs (process)

4. Arrange chicken thighs evenly on top of vegetables and sprinkle with Trader Joe’s seasoning.

5. Cover mixture and make sure crockpot is set to LOW. Cook for ~6 hours or until chicken and vegetables are tender.

ENJOY!

crockpot chicken thighs